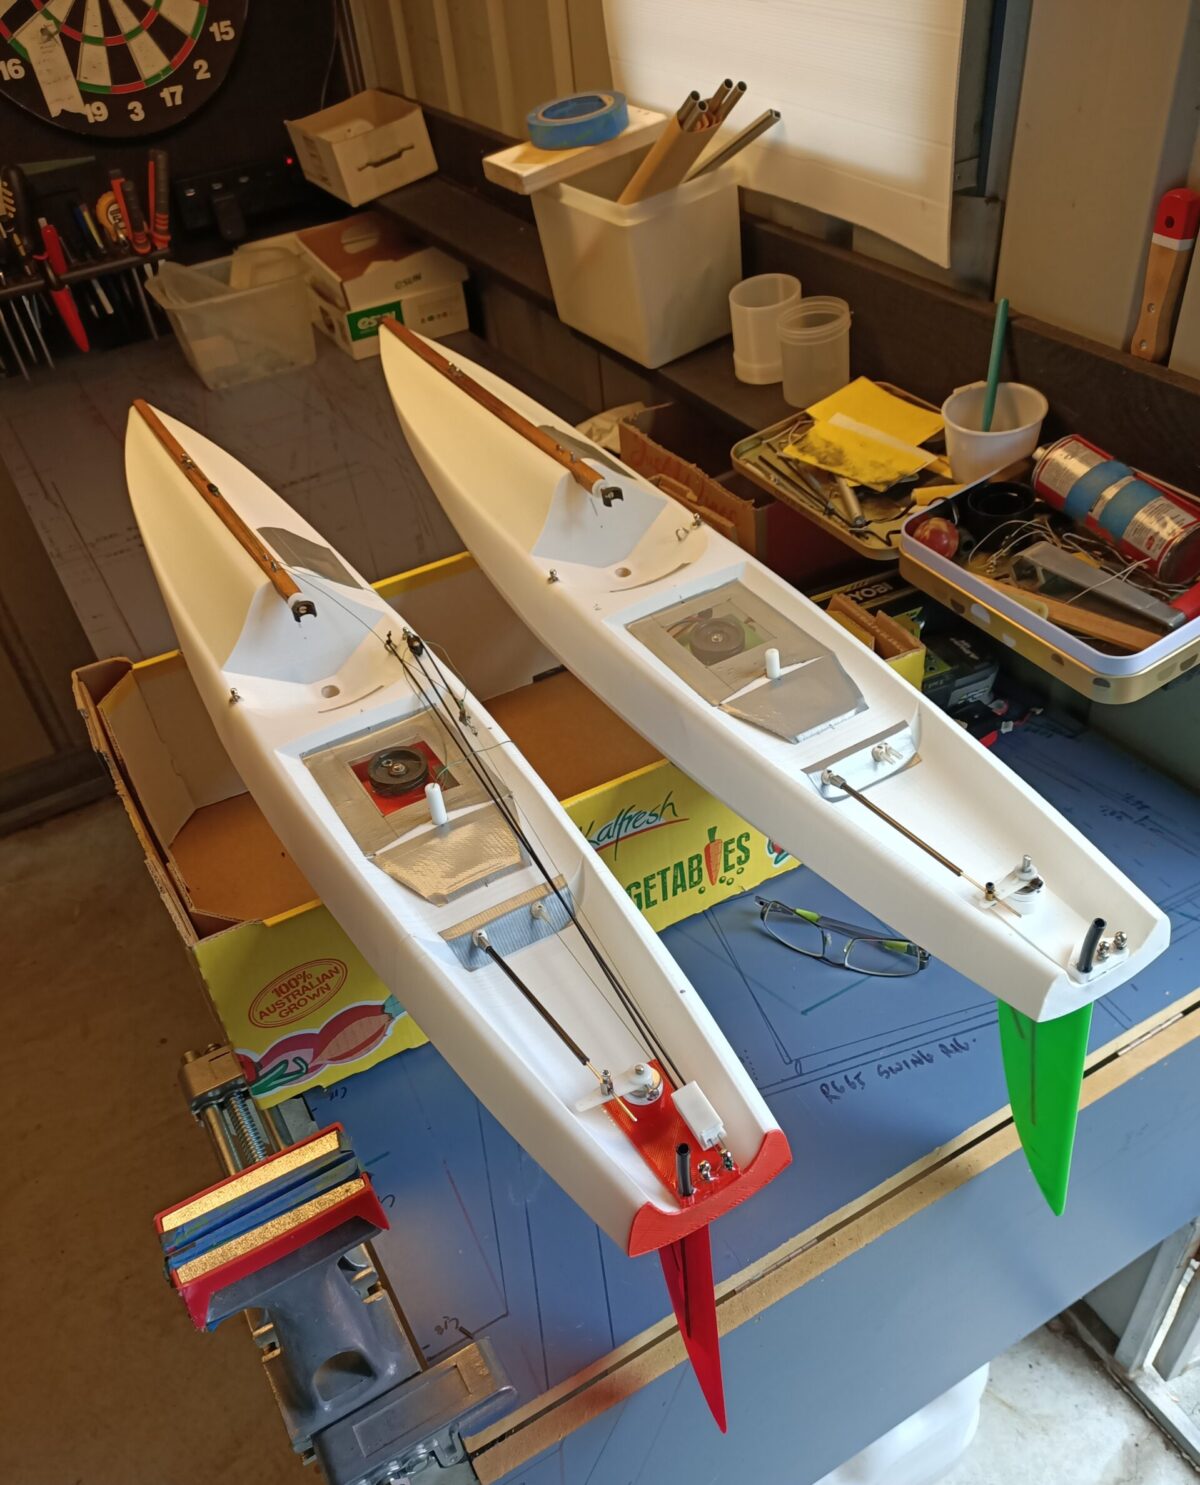
Assembling your 3D Footy
Bill Hagerup.
PLA is a tough material to cut or drill. Do not try to cut with a knife or to drill with a conventional bit. Use a Dremel with a thin cutoff disk for all cuts. Use a Dremel with a grinding point for drilling all holes. Use CA or epoxy adhesive to join parts.
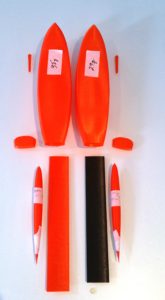
Parts required for hull assembly:
3D printed hull, fin, and rudder.
1 – 1/8 ” OD carbon rod or tube 290mm long.
1 – 1/8 ” OD carbon rod or tube 260mm long.
1 – 1/8 ” OD carbon rod or tube 140mm long.
1 – 3mm OD carbon tube 90mm long.
1 – 1/8″ ID aluminum tube 30mm long.
1 – 12 oz trolling sinker.
1 – 1/8 x 3/8″ balsa 300mm long.
Assembly steps:
- Cut rings off trolling sinker and smooth casting to use for bulb.
- Mark center of gravity (balance point) of bulb.
- Drill 1/8″ diameter hole at bulb balance point. Drill at angle so bulb points upward approximately 3 degrees.
- Sand the opening at the bow flat. Cut and glue balsa end piece in place. Sand to match hull contour.
- Cut hatch opening using a Dremel with a cutoff disk. Hatch opening is 40 x 40mm. The aft edge of the opening is 85mm from the stern.
- Reinforce the underside of the hatch opening with 1/8 x 3/8″ balsa.
- Drill hole on the centerline of the deck for the rudder tube 25mm from the stern. Use a Dremel with a pointed grinding bit.
- Drill two 1/8″ diameter holes in the deck for the fin rods. The hole farthest aft is 152mm from the stern. The forward hole is 162mm from the stern.
- Drill a 3mm hole in the deck for the mast tube. It is located 210mm from the stern.
- Drill a hole on the centerline of the bottom of the hull 30mm from the stern. Measure along the contour of the hull. Size the hull for your rudder tube.
- Drill two 1/8″ holes in the bottom of the hull for the fin rods. Use a flexible rule to measure following the contour of the hull. The aft hole is 159mm from the stern. The forward hole is 169mm from the stern.
- Drill a 3mm hole in the bottom of the hull for the mast tube. Measure 219mm along the contour of the hull from the stern.
- Insert a rod through each pair of holes to make sure the rod is vertical in both side and end views. Adjust the holes slightly if needed.
- Glue rudder and mast tubes in place and trim.
- Trim top of rudder on angle to match the contour of the hull bottom. Insert 140mm carbon rod into rudder 20mm from aft edge and glue.
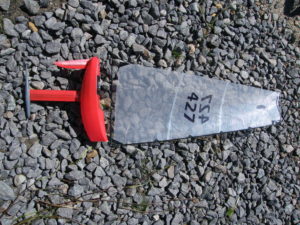
- Glue 290mm rod into the hole you drilled in the lead bulb. Trim the bottom of the fin to fit the bulb. Insert the rod into the fin 22mm from the aft edge of the fin. Don’t glue it yet. Insert the fin assembly into the hull and mark the contour of the fin top. Trim the fin top so that it matches the marked contour and the aft edge of the fin is 185mm long.
- Glue the fin to the rod and bulb with the rod 22mm from the aft edge of the fin. Insert the 260mm carbon rod 32mm fro the aft edge of the fin and glue.
- Insert the fin rods through the two holes in the hull and glue both rods and the fin to the hull.
- Fabricate a tiller to clamp onto the top of the rudder post.
- Fabricate a wire fairlead and glue to the top of the aft fin tube.
- Build a servo cassette to fit the hatch as described here: http://www.sailfootyuk.com/-make-a-cassette.html.
- Fabricate rigs as described here: http://www.sailfootyuk.com/ranger.html or here: http://www.sailfootyuk.com/make-simple-mcrig-sails.html. A more complex set can be made from plans here: http://www.sailfootyuk.com/easy-3.html.
Your 3D Footy is complete.
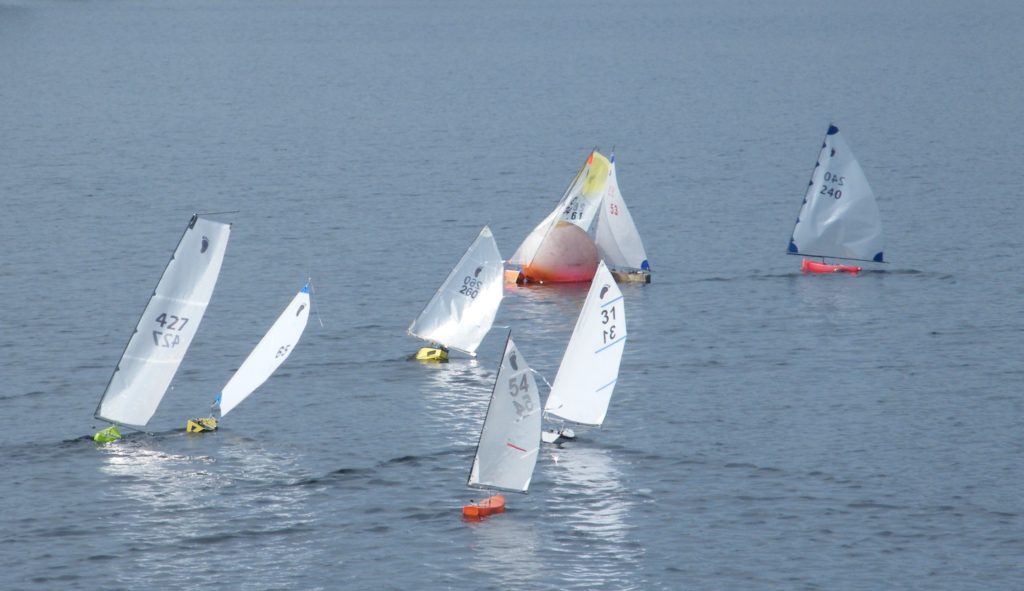
Have fun sailing and don’t forget to let us know how your project went and what you have learnt!